tossing ingredients into a 20 quart pot

Alternative to Canning Tomatoes

An easy alternative to canning tomatoes.


Canning your own sauce is awesome for the freshness, but I hate canning. It’s hot, messy, and time consuming. Not to mention, buying the tools gets expensive.

An old friend of mine taught me this alternative way to canning tomato sauce. I’ve been doing it for years. It’s easy, I love it, and I want to share it with you. Even if you don’t have an overflowing garden of tomatoes (I don’t), go to your local farmer’s market and grab a bunch. That’s what I do.

Side note: I was playing around with Photoshop’s watercolor tool. Not sure I like it, but the photos kinda look artsy.

You’ll Need

18-20 quart stockpot
Immersion blender
8 gallon size freezer bags
20 pounds of fresh tomatoes (I used heirloom), quartered
1 1/2 cups of EVOO
2 large Spanish onions, quartered
1 (8 oz.) jar of marinade already peeled garlic, or 30 cloves of garlic
1 cup of basil, packed
1/4 cup of sugar
1 tablespoon of Sea Salt
1 tablespoon of Pepper

Let’s get started…
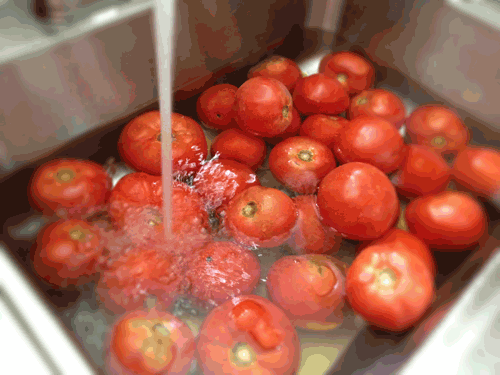
washing tomatoesTomato washing. If you buy from a farmer’s market, I wouldn’t worry about using any special vegetable wash. They usually do not use chemicals to help the growing process, but it’s always a good idea to ask. I just use warm water and a paper towel to wipe each one clean.
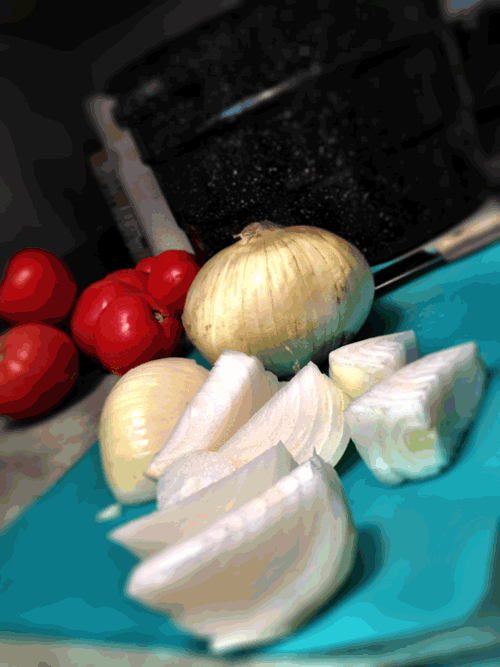
chopping onions in quartersThis recipe is also great for ‘no more tears.’ Instead of dicing your onions, chop your onions and tomatoes into big quarter size pieces.
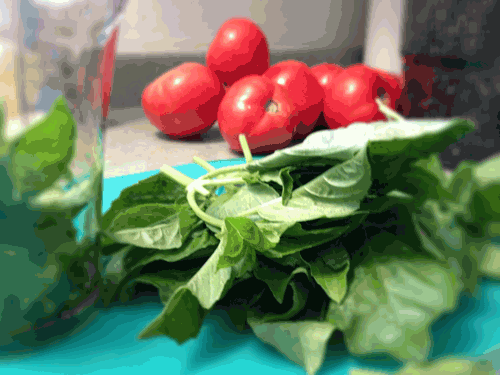
fresh basilNo need to chop up or remove the stems from your basil, and I will show you why.
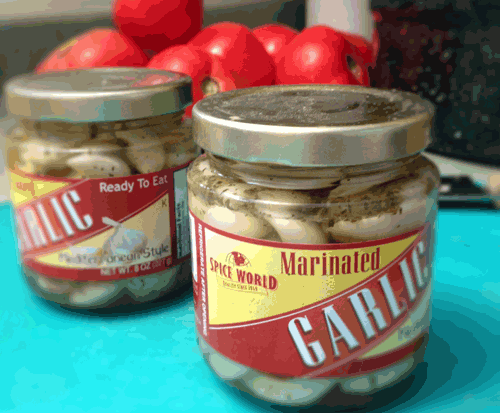
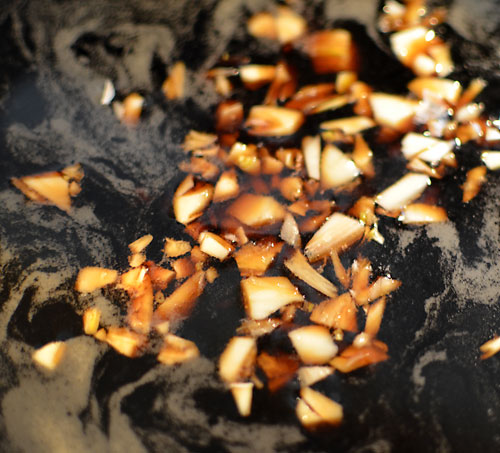
jar of peeled garlicFresh is best, but the point of this recipe is saving time. I use already peeled garlic to help me accomplish that goal.
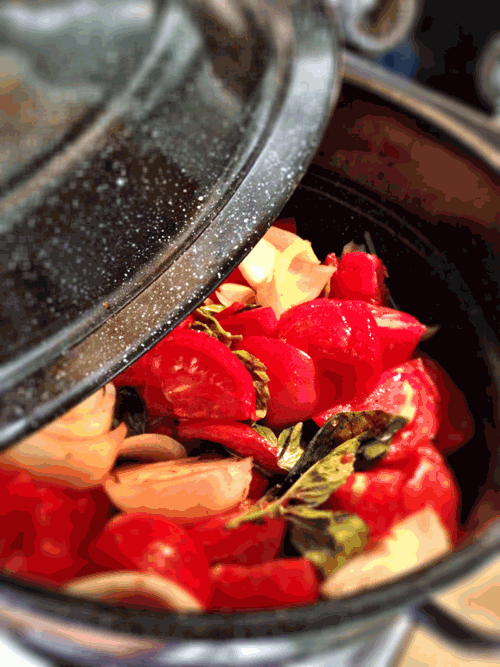
tossing ingredients into a 20 quart potToss it all into an 18 to 20 quart stockpot. On the stove, bring it to a boil on high heat. Cover and reduce to medium heat. Let the tomatoes cook down for about 10 minutes.
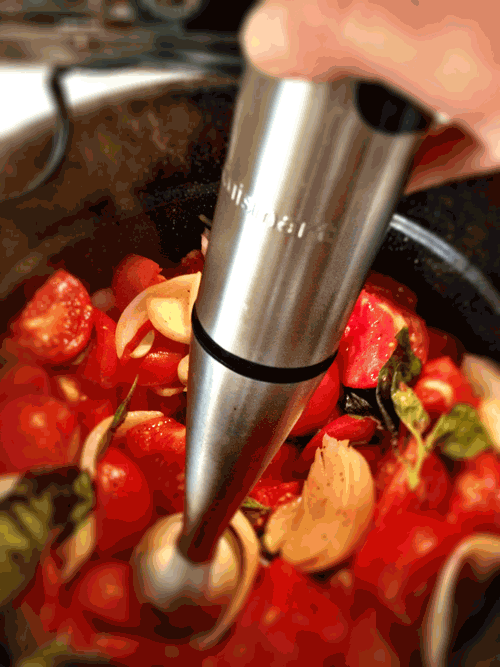
using an immersion blender in hot liquidBy using an immersion blender you save time…

  1. No fine chopping
  2. No skinning the tomatoes
  3. No long hours for it to all cook down

Using your immersion blender, start to blend all the ingredients together while it cooks. Warning: Do not lift hand tool out of the sauce while in use. Trust me. I’ve learned the hard way. Sigh.
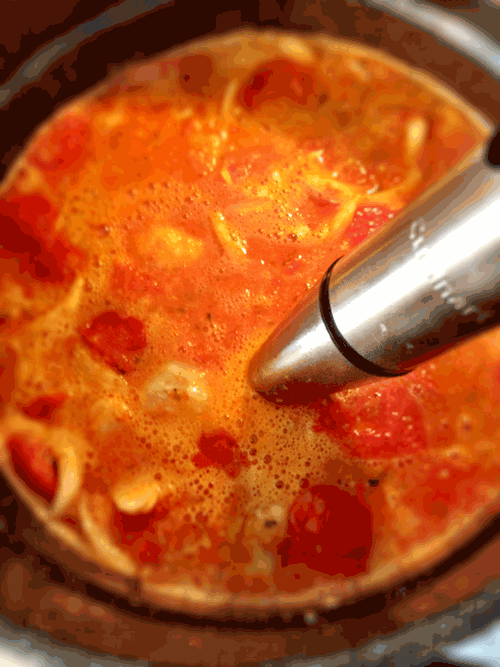
using an immersion blender in hot liquidContinue to blend for about five minutes.

Once everything is smooth and blended, bring sauce back to a boil, cover and reduce heat to simmer for about 30 minutes. If needed, add more salt and pepper to taste.
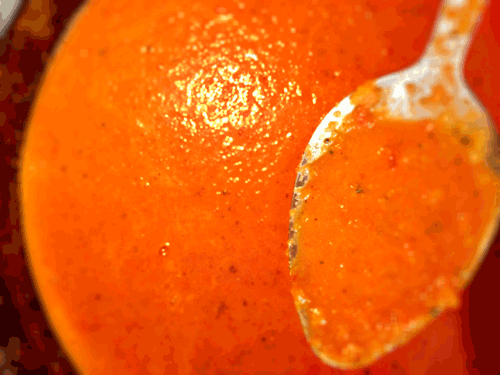
finished tomato sauceMake sure your sauce is smooth. If not, take the immersion blender back through the mixture.

Remove lid, and let cool until easy to handle.
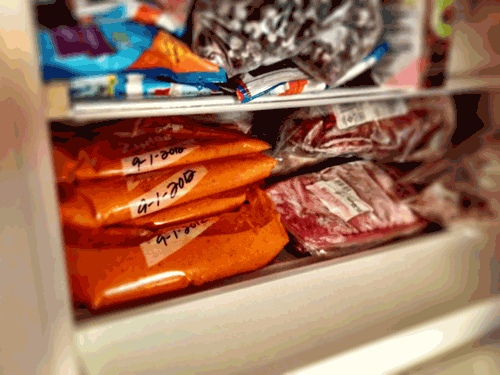
storing tomato sauce in freezerI don’t know about you but I do not have much freezer space.

I like that the baggies can lay nicely on top of each other. Take a black sharpie and write on the gallon size freezer bags, Tomato Sauce and the date.  Put four cups into each bag. Sauce will store in your freezer for about six to eight months.

Recipe makes eight baggies. That is equal to eight 26 ounce store bought jars. This saves me $20, and the freshness is well worth the effort. This is an all purpose sauce to be used for any recipe needing tomato sauce.

Little time. Little money. Little mess. No preservatives. A fresh alternative.


#GL2E
Recycle-Charcoal, Mr. Rabbit, Litterbox, Photo by Jenny MacBeth

Tip Thursday: Recycling Charcoal

Recycling Charcoal, Mr. Rabbit, Litterbox, Photo by Jenny MacBeth

Have a charcoal grill? Not sure what to do with the charcoal after cooking up your burgers? I got ya covered. Since I bought our Weber grill this summer (BTW, Great for BBQs), I’m finding cool ways to recycle the charcoal. There are a ton of uses for it. Just use Google. Of course, I can’t take credit for the few I mention below, can I? These are just the ones I’ve tried and found they work.


  1. My fav. I really love using it as a room deodorizer near litter boxes. Of course, you need to store it up high, outta danger.
  2. Great plant fertilizer. It contains nutrients that help plant growth in ‘some’ plants, inside and out. Google it!
  3. Got weeds? Crush used charcoal up and spread over your problem areas.
  4. Or, at the very least, save a few for your winter snowman.


Have some recycling charcoal ideas? Please share.

#GL2E, but also, #recycle.


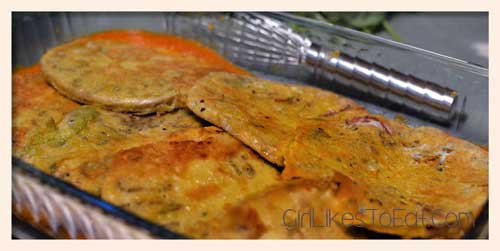
sicilian style eggplants

Sicilian Style Eggplant Casserole and Cheese Pastry Puffs

A delicious twist to Eggplant Parmesan.


The best market place in Pittsburgh is the Strip District. There’s never a dull moment with lots of diversity from the food to the people. You can’t help but want to peruse the wares of the outdoor vendors. You can find everything from Yinzer pride souvenirs, to fresh foods, to hipster cafés, to down-home diners. Fabulous good stuff!

The streets get packed on the weekends. Especially, on a bright sunny day no matter the temperature. Be prepared for a crowd. I love the outdoor market feel. There is no other place like it in the city.  When you’re shopping in the Strip you’re really a part of Pittsburgh’s history.

My family and I go to the Strip at least once a month. We go early to find free parking. If you are willing to pay for parking, then you won’t have any problems. We grab breakfast at Pamela’s or Deluca’s, both serve awesome diner food, before heading out to shop for seasonal yummies.

One place we always hit is Stan’s Produce Market. He pretty much gives it away; very cheap yet great quality produce. It definitely beats sub-par grocery produce. I spent a total of $19 on two large eggplants, a large bag of carrots, three avocados, a bunch of leeks, onions, basil, a jar of already peeled garlic, and a few other things. That’s just craziness. That is why I dedicate this recipe to Stan’s Produce Market in the Strip. You inspired me to make this because I couldn’t pass up a good deal.

No beer in this eggplant casserole recipe, but that doesn’t mean you can’t have one. I am!

sicilian style eggplantsYou’ll Need

2/3 cup of all-purpose flour
2/3 cup of Italian bread crumbs
2 Sicilian style eggplants, peeled and sliced
4 large eggs
3 cups of tomato sauce (I use my Alternative to Canning Tomato Sauce)
1/2 cup of Basil, roughly chopped. I just pull apart with my fingers.
1 cup of Parmesan cheese, grated
8 – 10 slices of fresh mozzarella balls
Lemon zest, about half of a lemon
Olive oil, as needed
Sea salt and ground pepper

Let’s get started…

Put your tomato sauce in a sauce pan and cook over medium heat. If you are using my Alternative to Canning Tomato Sauce recipe, and it is frozen, there is no need to thaw it. Just take it from freezer to pot, and cover to help speed up the process.

add lemon zest to your tomato sauce, photo by Glen GreenAdd lemon zest to the warming sauce. Not much is needed at all. I do a little less than half of a lemon. As my friend Leslie says, “It seems to brighten the flavors.”

thinly slice eggplants Slicing

While your sauce is heating, slice your eggplant (about a quarter inch thick).

dip eggplant into flour then into egg washMixing

Mix together the flour and bread crumbs in a flat dish. Beat the eggs in a separate flat dish. Coat each eggplant slice in your flour mixture then dip each one in egg wash.

brown eggplant slices on both sides in a hot skilletFrying

Heat the olive oil in a skillet over medium-high heat. Transfer coated eggplant into the hot skillet, and fry for 30 seconds on each side. Transfer to a paper towel.

make two layers in a baking dish with sauce, eggplant, basil, parmesanLayering

Spread a layer (about 1 cup) of warm sauce on the bottom of a 9×13 baking dish.

Top with a layer of fried eggplant slices. I overlap each slice.

Sprinkle basil over the eggplant (about 1/4 cup per layer).

Add a layer of Parmesan (about1/2 cup per layer).

Repeat one more time; giving you two layers.

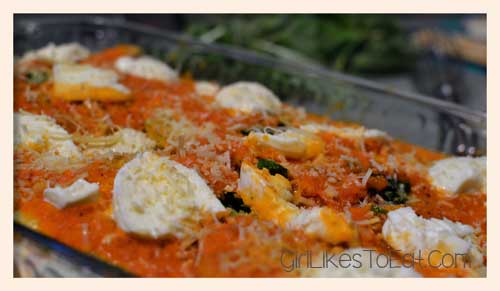
top it off with sauce, fresh mozzarella basil and parmesan then bakeTop it off with about nine slices of fresh mozzarella; sporadically placed.

Baking

Bake at 350 degrees for about 45 minutes, uncovered

Let it cool for 10 minutes before slicing.

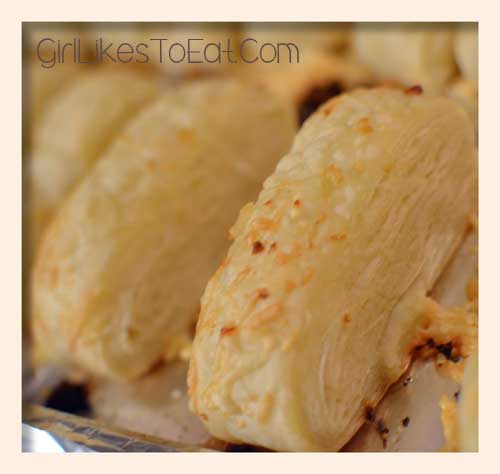
bake pepperidge farms puff pastryCheese Pastries, The PUSHER

As Glen’s father, Ed, would say, “You need a pusher.”

Pusher Definition: A bread-like substance, such as, muffin, biscuit, or crusty bread, to help you push your food onto your fork.

Ha! I agree.

While your eggplant cools a little, cook your pastries.

For Pastries, You’ll Need

Pepperidge Farm Puff Pastry Sheets (two sheets per box)
2/3 cup of Asiago cheese, grated (or any cheese you like)
1/2 of lemon, zested
2 cloves of garlic, crushed
Olive oil (about 2 tablespoons for drizzle)

Pastry Instructions

Thaw according to the instructions on the box. I usually set it out on the counter while I make the eggplant.

Coat a cookie sheet with cooking spray. Leave pastry sheets folded and place on the cookie sheet. Cut pastry sheet about one inch wide, and separate with a little space between each one.

Drizzle olive oil over the pastries. Sprinkle the cheese and garlic over the top. Finally, take your lemon and zest sporadically over the pastries. Don’t worry about being neat with the ingredients. – The olive oil will soak up the flavors; infusing the pastry while it cooks.

Bake at 400 degrees for about 10 minutes.

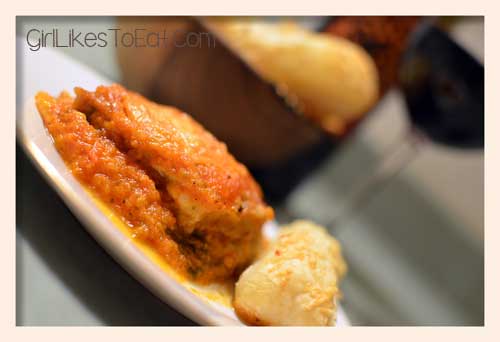
let stand for 5 minutes before cutting. serve with asiago pastryDone! Serve with a green salad and a Peroni Red. Your family is going to love it. Glen does not like Eggplant Parmesan and said, “This is amazing. I love the textures.” I believe the secret is in the fresh produce and the lemon zest. A little zest brightens the flavors. That goes for life in general.

Depending on how big you cut the slices, the eggplant can serve 6 to 8 people. The Pusher makes about 18 -20 individual pastries.

Thanks for the yummy produce and great prices Stan.


reynolds wrap, wraps, photo by Jenny MacBeth

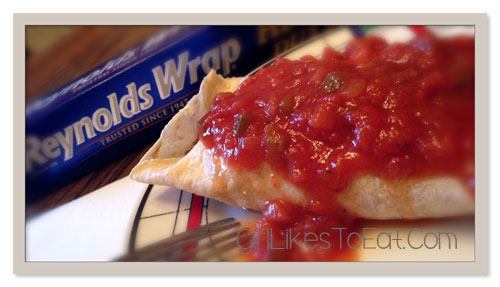
Grab-N-Go, Mexican Stuffed Wraps


This recipe was created for a Reynolds Wrap contest. Bummer, I didn’t win. Boo hiss. I’m over it, but WTH, right?

The contest instructed to create a recipe using four ingredients from a list of foods they supplied, and of course, use Reynolds Wrap.

You can double the recipe and freeze it for those the Grab-N-Go busy days. I freeze for up to two months. My guinea pigs (aka co-workers) sure did like’em. You really can’t screw up the taste when cream cheese is melted inside. Yummy!

reynolds wrap, wraps, photo by Jenny MacBethYou Need

1 ½ pounds of 95% lean ground beef
1 (15 oz) can of black beans, drained
2 ears of corn on the cob, remove kernels from cob
1 cup of onion, diced
1 tablespoons of chili powder
1 (15 oz.) can of tomato sauce
1 (4 oz.) can of green chiles
zest from 1 small lime
2 tablespoons of cilantro, chopped
1 (4 oz.) Philly cream cheese
10 Flour Tortillas
2 cups of Mexican cheese, shredded
10 pieces of Reynold’s Wrap

Let’s get started…

Preheat oven to 350.

Brown ground beef in large non-stick skillet over high heat. No need to drain beef if you use 95% fat free. Reduce heat to medium and add black beans, corn, onion, chili powder, tomato sauce, green chiles, lime zest, and cilantro.

Mix it all together, cover skillet, and let it cook for 5 minutes over med-high heat.

Add in cream cheese. Stir constantly over med-high heat until cream cheese is melted.

Cut off a large piece of Reynold’s Wrap. Spray both sides of tortilla shells with cooking spray, and place in the center of Reynold’s Wrap. Repeat until all the shells are stuffed.

Add 1/2 cup of ground beef mixture to the shell and sprinkle with Mexican cheese. Roll up the tortilla shells, tucking in the sides. Place face down. Roll up with Reynold’s Wrap.

Place on a baking sheet and bake for 10 minutes. If you want to freeze a few, wrap it up as I mentioned, and put into a freezer bag. Grab one and cook it when you are ready to eat it.

Serve with salsa and sour cream and your favorite ale. Makes 10 tortillas.

So, I may not have won the contest, but I’d like to know what you think. Shoot me a message when you try it. Thank you.


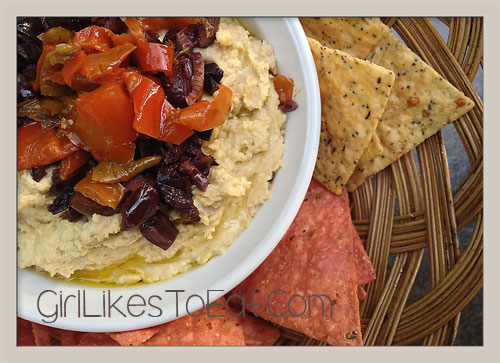
Middle Eastern Hummus, Photo by Jenny MacBeth using iPhone 4S

Easy Hummus Recipe

As I mentioned on Facebook, I’ve never made hummus, so I researched online recipes. I’m sure you can agree, when you Google Hummus, it can be overwhelming. I just used the common ingredients; chickpeas, tahini sauce, and lemon juice, and added in some of my own yummies.

Since making it, the hardest part was deciding on the toppings. The flavor of hummus is like the color black; it goes with everything. You can use whatever your little taste buds desire.

A Facebook follower, Missy, piqued my interest with roasted red peppers. When I was at the grocer, I noticed a  jar of fried, marinated peppers. Grabbed it! I also diced up some Kalamata olives and walnuts. I left the toppings off for my guests to decide how to dress it.

Since I had eight cans of chickpeas in my cabinet, ah, er, a lot, I shared with all my friends (aka guinea pigs). I’ve also adjusted the recipe to fit a more reasonable party size. Tee hee!

Middle Eastern Hummus, Photo by Jenny MacBeth using iPhone 4SYou’ll need

2 (15 oz.) cans of chickpeas (garbanzo beans)
½ cup lemon juice, I used fresh squeezed
½ cup tahini sauce
As much garlic as you like. I used two cloves per can of chickpeas.
1 teaspoon of cumin
1 teaspoon of salt (to taste)
1/3 cup of extra virgin olive oil
Your favorite additions – roasted or fried red peppers, basil, pine nuts, paprika, crushed garlic, sliced almonds, diced onions, jalapeños, the list is endless.

Let’s get started…

Many recipes call for a food processor or blender. I have a immersion blender. It’s easy to clean, and one of my favorite kitchen tools.

Drain and rinse the chickpeas. In a large bowl, mix your lemon juice and tahini, until thick. Add in your garlic, cumin, salt, olive oil, and chickpeas. Now, you can mix in your additions at this point, or add just a little, or use for toppings. Decisions. Decisions. Just be creative. I used a jar of fried peppers and its juices, as a topper. You can’t go wrong with hummus. For years, I thought that it would be hard to make. People have told me that it’s difficult to balance the flavors. As long as you don’t go overboard with the lemon juice and salt, I don’t see any problems in ruining the taste. Okay! Perhaps you can screw it up, but if you take baby steps in your experiment, you can always fix it.
Whatever you decide, start to blend everything together. With using an immersion blender, you may need to add a little water, or olive oil to help get it smooth. It doesn’t have to be perfect. It will still taste yummy. Trust me.

Serve up with your favorite tortilla chips, crackers, and/or veges. Challenge: Try spreading hummus on a sandwich, or burger, or chicken, etc., and let me know what you think.

Enjoy!


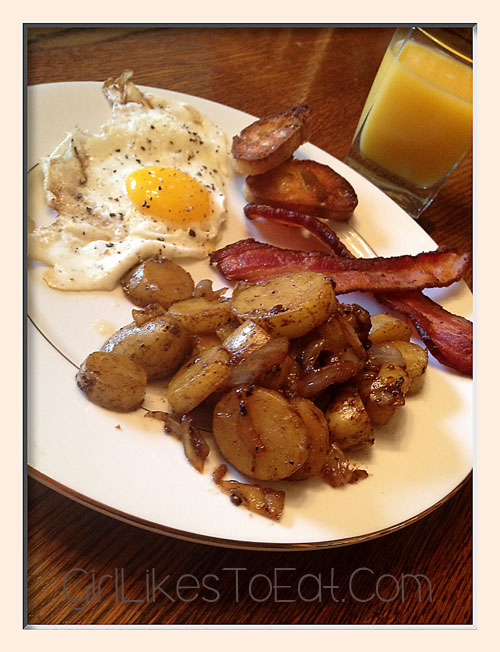
Cast Iron Skillet, Sweet Fried Potatoes

Breakfast is my favorite meal. Mostly because I always have bacon. Since we moved into our new home, we’ve had overnight guests just about every weekend. Absolutely love a full house for breakfast served with mimosas.

This recipe is my sister, Donna’s. I’m also thinking that it’s a Pittsburgh thing because I know a lot of people who serve their fried potatoes with sugar and onions. It’s the best!

Cast Iron Skillet Sweet Fried Potatoes, Photo by Jenny MacBeth

You’ll need:

1/2 stick of real butter
1 (24 oz.) bag of fingerling potatoes, sliced
1/4 cup of brown sugar
1 1/2 cups of sweet onion, chopped
4 garlic gloves, minced
Sea salt and fresh ground pepper, to taste

Let’s get started.

Brown butter in cast iron skillet on medium-high heat. Once the butter is brown, stir in the potatoes and cook for three minutes.

Reduce heat to medium and add in the brown sugar, onion, garlic, salt and pepper. Keep tossing the potatoes until soft and onions are slightly blackened with a caramelized coating. This takes roughly five minutes.

Serve with your favorite breakfast eggs and bacon (of course). This is even great with your favorite dinner.

The cast iron skillet is the secret. I’ve made this same recipe in a non-stick skillet and they do not taste the same.

Do you use sugar in your fried potatoes?

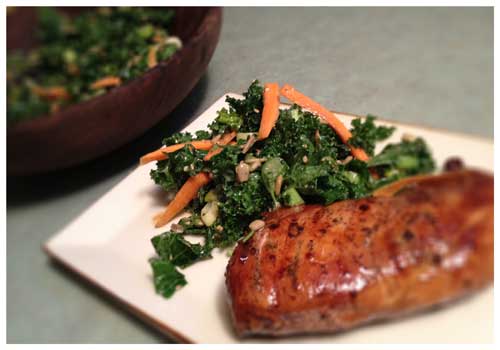
Kale Salad with Dijon Dressing

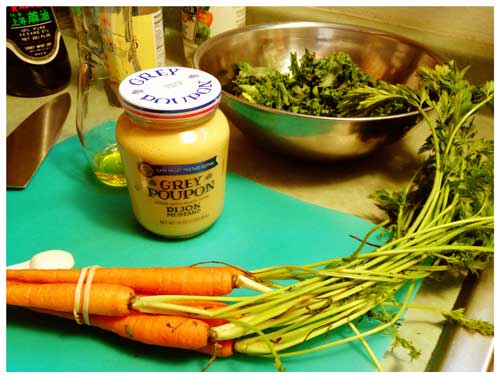
Okay, kale, it’s green. IT’S GREEN. It’s also very bitter. This is the first time I’m eating it raw. I’ve had it cooked in butter, and that’s always a good thing. I read an article of the benefits of eating lots of kale. Which, I already knew, but it’s GREEN. It said that kale is king of green foods. It’s packed with calcium, minerals, vitamins, fiber and great for those detox’ers. I thought, “What the hell. Why not? I’ll just add my Dijon dressing to it, and all will be right.” All the while, keeping my fingers crossed.

Kale Salad, Photo by Jenny MacBethI took a few handfuls of chopped kale (about 2 cups). Since I didn’t have shredded carrots, I stole a few off the bunnies. Shhh! Buy a bag of shredded carrots, or julienne two small carrots.

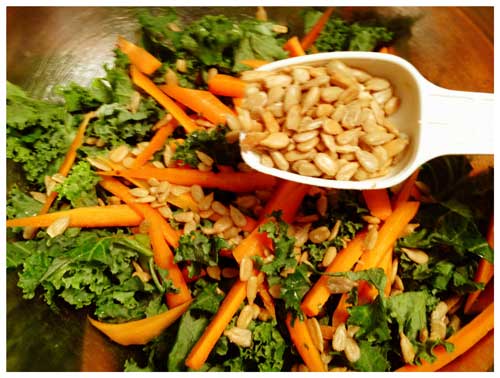
Kale Salad, Photo by Jenny MacBethUse about 1/4 cup of parsley and sliced green onions. Add about two tablespoons of sunflower seeds, and one tablespoon of sesame seeds.

Kale Salad, Photo by Jenny MacBethSeason with ground sea salt and ground black pepper. My mistake, I was thinking, “This is going to be one bitter salad,” that I added too much salt. – Trust me, it’s so good that you only need a little.

For my Dijon dressing: Mix together one tablespoon of EVOO and Dijon. Add in one teaspoon of vinegar. – Whisk.

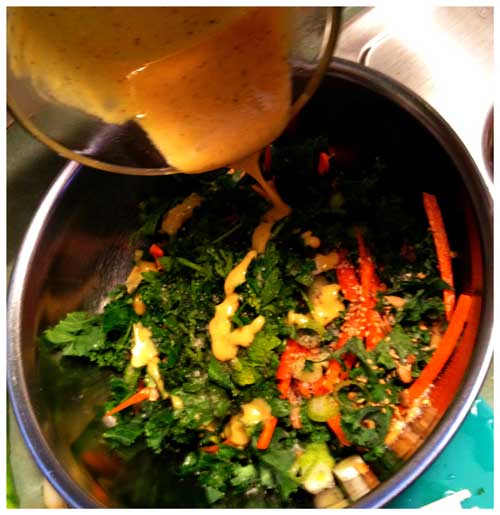
Kale Salad, Photo by Jenny MacBethDrizzle over the greens and toss. This salad is moan worthy.

Secret ingredient: Pair this salad with a Belgian Pale Ale, or even a Blue Moon.


Please share your ideas because this girl likes to eat.


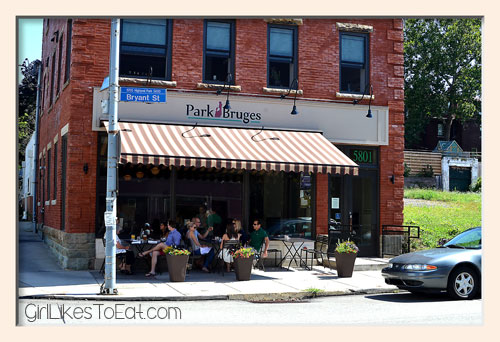
Park Bruges Cafe, Photo by Jenny MacBeth

Park Bruges Café Pittsburgh


My fellow foodie and niece, Nicole, and I, are big brunch peeps. We love our cocktails, and food. We are definitely related. Nicole mentioned that we need to hit up Park Bruges Café located in Highland Park area of Pittsburgh.

Park Bruges Cafe, Photo by Jenny MacBeth

If you visit Pittsburgh, you need to get there. If you live in Pittsburgh, and haven’t tried it, you need to get there. It’s a popular place for brunch, and they do not take reservations. You may have to wait for a seat, or eat at the bar. Tip: Arrive early; before they open at 11:00 AM. You’ll be seated pretty quickly.

Nicole and I always try to order several things off the menu to split.  It gives us a wide variety of their flair. Their brunch menu is pretty big with lots of options. If you’re indecisive, you’re screwed. Another reason to share your food. They also have great brunch beverages.  We ordered from their Prix Fixe Brunch menu for $20-24 per person. You get a choice of entree, side dish and beverage. Nicole ordered their Omelet of the day.

Park Bruges Cafe, Photo by Jenny MacBeth

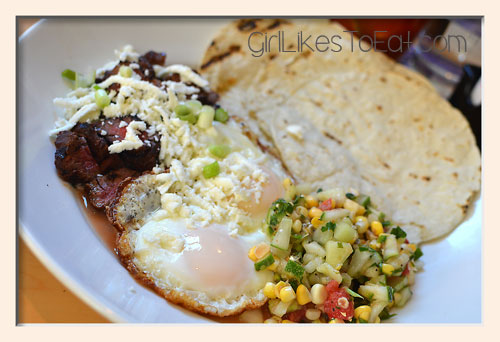
I had the baked eggs in chili verde; green chillies, pulled pork, chipotle crema topped with two poached eggs and fresh tortillas. I’m not a fan of poached eggs, but my mouth watered with every bite. We also munched on a few must-have side dishes that included potato gratin and smoked, apple bacon. The portions are large, so be prepared to take food home.

Park Bruges Cafe, Photo by Jenny MacBeth

To wash it down, we had the house mimosa and a Bloody Mary, both satisfying.

According to  Yelp reviews, the mussels are fantastic, and they have a long list of craft beers with some hard-to-find selections on draft. I will need to go back.

Overall, I’m a big fan. The food was delicious. The cocktails were refreshing. The customer service was exceptional. The atmosphere was contemporary and bright.  Pleasing all my senses. Park Bruges is making my Pittsburgh Favorites list.

Park Bruges and Point Brugge are owned and operated by the same people. I’ve never been to Point Brugge, but I will need to try it out in the near future. Nicole, when can you go?

Have you been there? What do you think? Shoot me a message.


Habitat at Fairmont Pittsburgh


Just because Cinco de Mayo is over, doesn’t mean you can’t enjoy some Mexican favorites. Besides, margaritas are best all year long.

On May 5, for my niece’s birthday, we took a cooking class at Habitat restaurant located at 510 Market Street, Pittsburgh, PA in the Fairmont Hotel. The hotel is only two years old, and absolutely lovely. I’ve never stayed here, but from the great attention we received for just an afternoon, I can tell it’s a fine venue to lay your head.

At the Habitat, the food is internationally inspired, but uses “locally sourced, organic and sustainable items wherever possible.” The atmosphere is contemporary and very relaxing.

Each month the Habitat hosts a different cooking class where you get an apron, a hat, recipes, and enjoy the meal you helped prepare. The class is a low-hands on approach. – They didn’t let us use knives. Thank goodness! Chef Luis Jimenez knife cut everything as though it were butter. Very. Sharp.

photo by Jenny MacBethThis is by far the best experience at a restaurant I ever had. I highly recommend other restaurants to do this. Not only do you get to enjoy a meal, you get to hangout with the chefs and help prepare it. How cool is that? As you will see in my photos, it is well worth $65 per person. We spend that much eating out at The Cheese Cake Factory with no fun times in the kitchen. Just so cool.

We were greeted by Sous Chef, Paula Smagacz, our host for the afternoon. She was super sweet, very talented and funny. Thanks Paula for an enjoyable day.

First things first…

photo by Jenny MacBethChef Paula, took us on a tour of their two-story kitchen filled with different types of chefs. The kitchen was immaculate. When eating out, do you ever wonder what the kitchen looks like? Pretty neat to see it, and know it’s spotless.

Here you see a statue made of chocolate. I’m not sure I could eat it. Hell! Who am I kidding. It took much discipline not to reach out and snap a piece off…

photo by Jenny MacBethEspecially, the bunny ears. Look how cute!

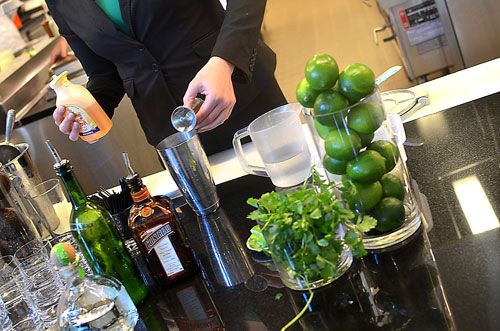
photo by Jenny MacBethAfter the kitchen tour, they made us Skinny Margaritas. Can I get a Hell Yeah?

Here is their recipe.

2 oz. Patron, or any tequila

1 oz. Cointreau

2 oz. fresh squeezed lime juice

1 oz. agave nectar

Put rim of glass in lime juice, then roll in coarse salt. Combine all ingredients in a cocktail shaker. Add ice and shake. Pour into glass and enjoy.

photo by Nicole AustinThis was spectacular. I think I asked, “May I have another?” about three times.

photo by Jenny MacBethLet’s get cooking…

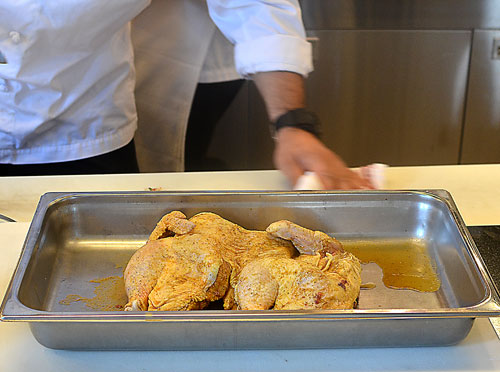
Season whole chicken breasts with salt and black pepper. Coat a saute pan with oil and sear chicken on both sides over medium high heat. Chef Luis said it’s better if you use the grill.

Toss in one tablespoon of each of the dried spices of sweet paprika, smoked paprika, cumin seeds, and dried oregano. Cook in pan for a few seconds then add chicken stock enough to cover the meat. Lower the heat to medium low. Simmer mixture for about 20 minutes until chicken is thoroughly cooked.

photo by Jenny MacBethRemove chicken from broth and pull apart. If you are going to store it in the refrigerator, pure some broth over it to keep it moist.

Ingredients:

Chicken breasts

Salt and Pepper

Oil

1 tablespoon sweet paprika

1 tablespoon smoked paprika

1 tablespoon cumin seeds

1 tablespoon dried oregano

Chicken stock

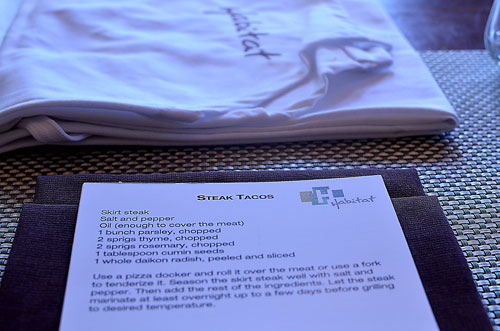
photo by Jenny MacBethI did not know this, but using radishes in your steak marinade helps tenderize the meat. Chef Luis used Skirt Steak. He also said you could use Flank Steak. I always have a problem with it even using processed tenderizers. He simply poked the steak with his fork on both sides and used a radish in the marinade. He also said the best method is use a pizza docker and roll it over the meat to help tender it.

Marinade recipe for the steak tacos:

Skirt Steak

Salt and pepper

Oil (enough to cover the meat)

1 bunch parsley, chopped

2 sprigs thyme, chopped

2 springs rosemary, chopped

1 tablespoon cumin seeds

1 whole daikon radish, peeled and sliced

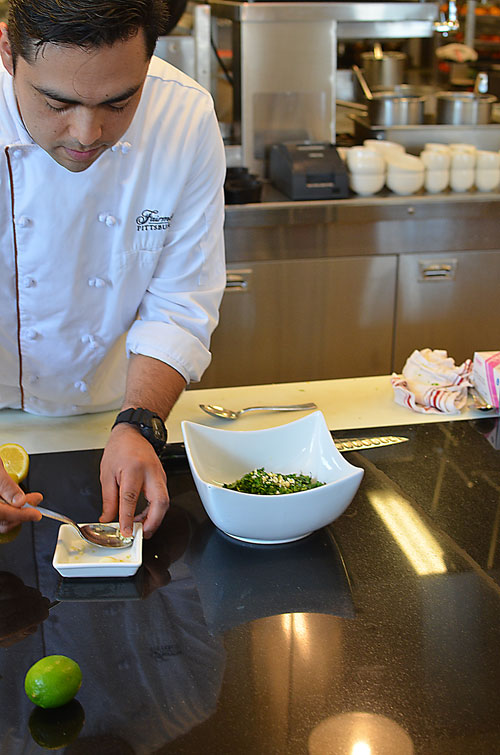
photo by Jenny MacBethNext up is Chimmichurri. Yum. Yum. I could make this and use it on my sandwiches. Just divine.

The recipe:

2 bunches parsley, rough chopped

1 bunch cilantro, rough chopped

1 garlic clove

Lemon, juiced to taste

Salt and pepper to taste

Olive oil

In a blender or food processor, pulse the fresh herbs and garlic. Add lemon juice, salt and pepper and blend. Slowly drizzle in enough olive oil to create a sauce. Taste and season as needed.

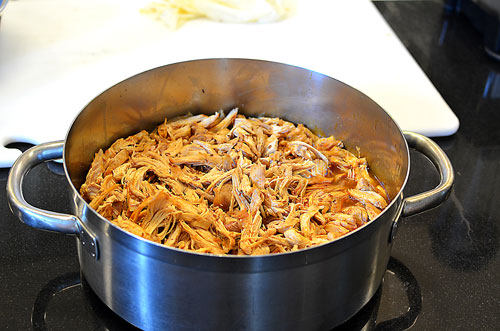
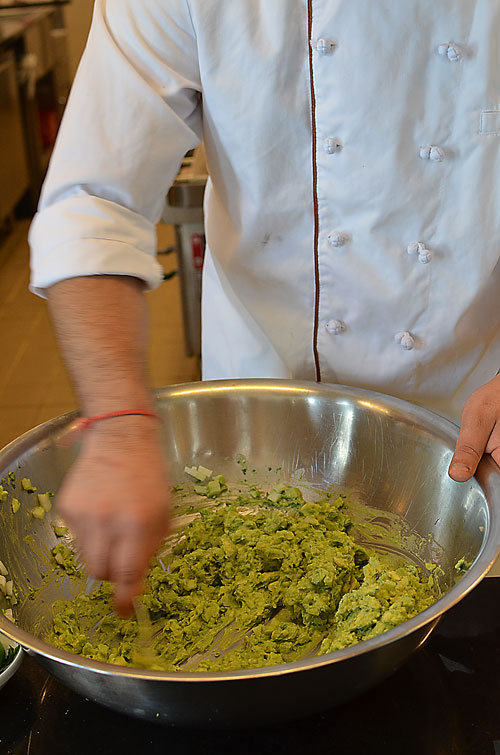
photo by Jenny MacBethGuacamole. The recipe is simple. I didn’t get a recipe card for this one. However, it was pretty close to mine, but he added in red onion and green onions. For guac, you don’t need a recipe. Put whatever you want in it. It’s easy.

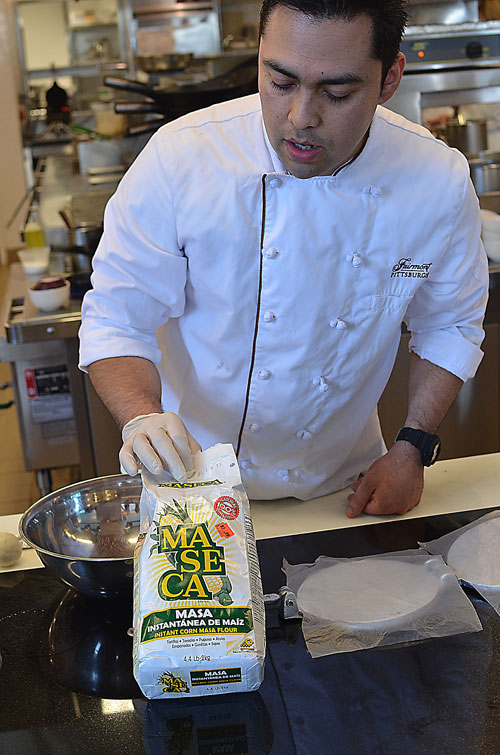
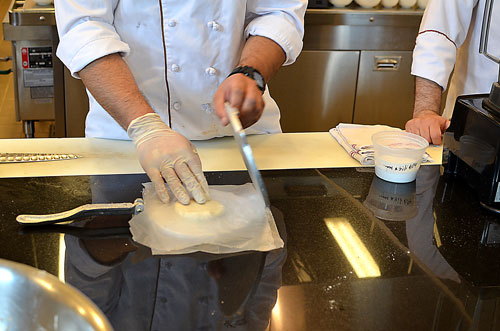
photo by Jenny MacBethGuess what I’m getting at the Mexican grocer this weekend? For the tortillas, simply follow the recipe on the back of the bag. Smoosh it together in a bowl with your hands. Fun! Create golf ball sized balls…

photo by Jenny MacBethAnd, smash it in this handy tortilla maker. You can use a rolling pin, but that’s no fun. I’m picking up this handy tool. It’s under $10. Why not?

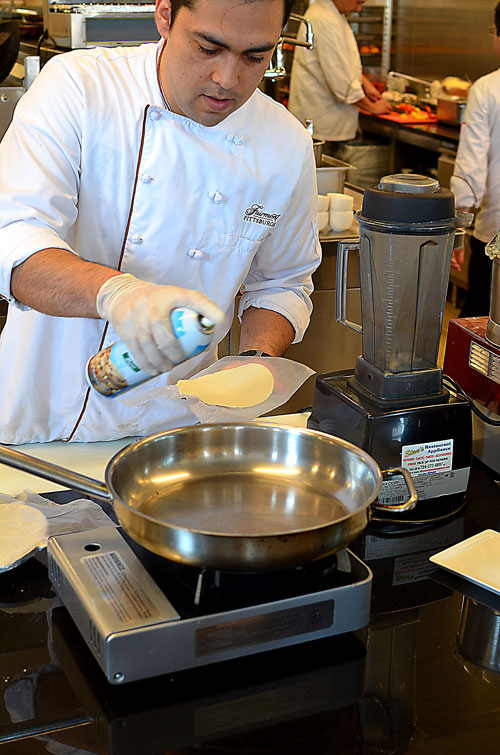
photo by Jenny MacBethSpray your pan over medium heat and cook on both sides until slightly golden.

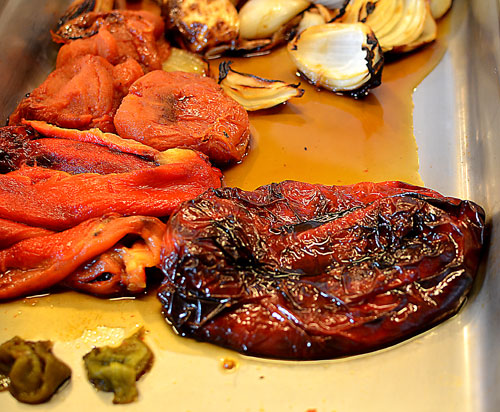
photo by Jenny MacBethRoasted Tomato Salsa. Best salsa EVER.

3 tomatoes

3 onions

3 jalapenos

3 red bell peppers

Oil

1 tablespoon orange juice

Salt and pepper

1/2 bunch cilantro, chopped

Wash all vegetables and toss with a small portion of oil to coat. Place the vegetables in a roasting pan and bake at 325 degrees for approximately 45 minutes until everything is charred well. Allow to cool until able to handle. Remove seeds from both peppers. Blend vegetables and orange juice. Season with salt and pepper then fold in the chopped cilantro.

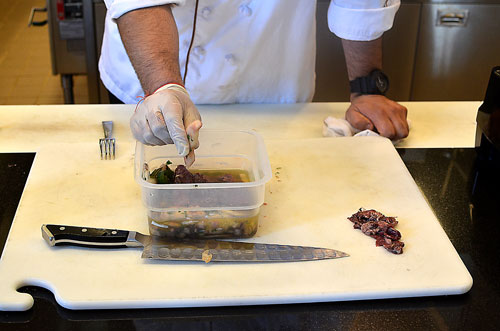
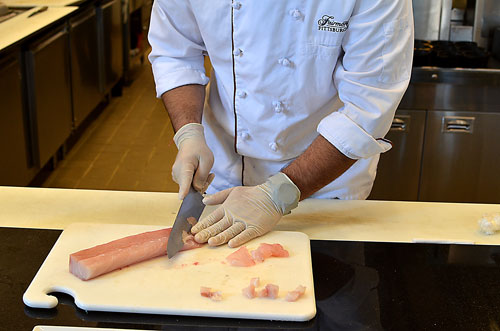
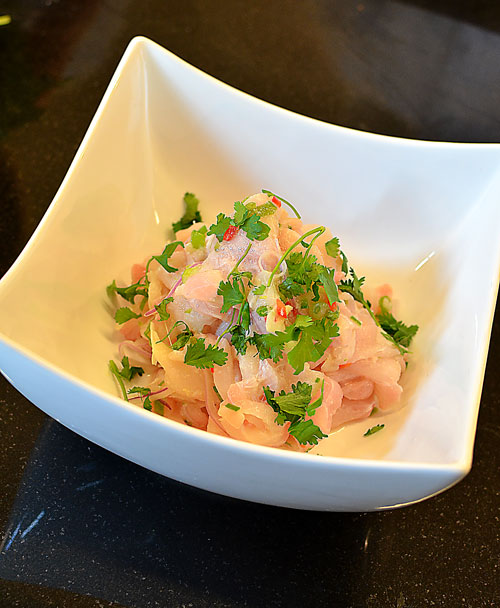
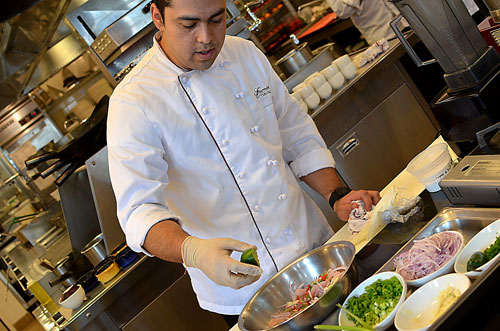
photo by Jenny MacBethAre you a sushi fan? Well, this is not sushi, but it’s raw fish cooked by juices. Ceviche.

White fish (bass, snapper, or yellow tail), sliced sashimi style

Jalapeno, brunoise

Shaved garlic

Basil

Cilantro

Salt

Green onions

Shaved red onions

Red pepper, brunoise

1 tablespoon each of fresh lemon, lime and orange juice

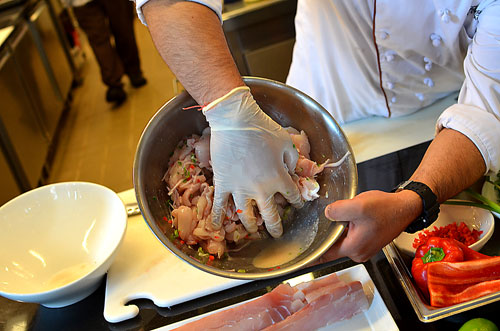
photo by Jenny MacBethMix in all ingredients and add the citrus juices a few minutes prior to serving.

photo by Jenny MacBethThe juices will start to cook the meat. You will see the pink fish turn white.

photo by Jenny MacBethSprinkle with fresh cilantro.

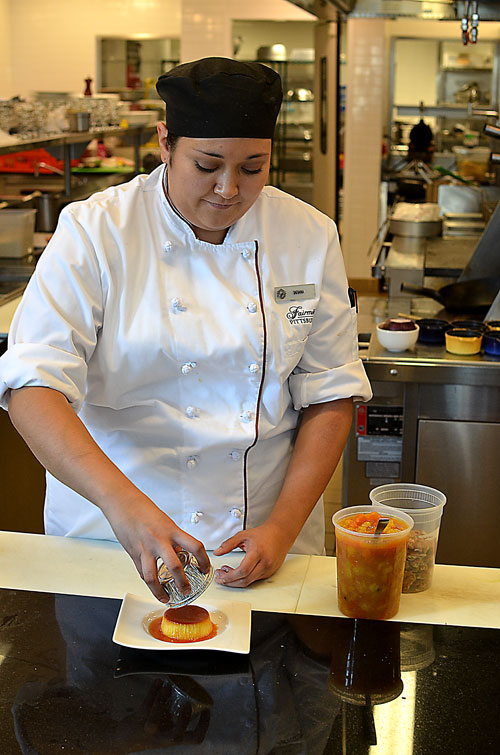
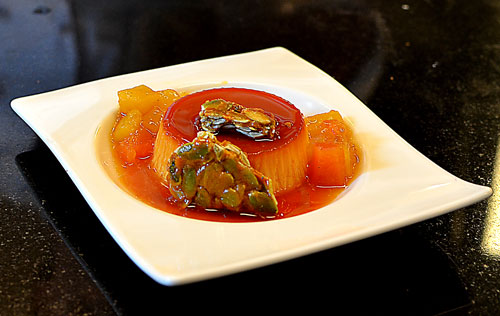
photo by Jenny MacBethFor dessert, Flan. As much as I love custard and caramel, I’m not a fan of flan. However, I have to say that this was good.

photo by Jenny MacBethSpanish Cinnamon Flan:

1 1/2 cups sugar

2 tablespoons water

1/2 lemon, juiced

2 cups heavy cream

1 cinnamon stick

1 vanilla bean, split and scraped

3 large eggs + 2 large egg yolks

Pinch of salt

To make the caramel: Have ready a 2-quart round flan mold and a large roasting pan. Combine 1 cup of the sugar and 2 tablespoons of water in a heavy-bottomed pot.

Place over medium-high heat and cook until the sugar begins to melt. Swirl the pan over the heat until the syrup darkens to a medium amber color, about 10 minutes. Do not stir with a spoon.

Remove from the heat and immediately add the lemon juice, swirl the pan again to combine, and then pour into the flan mold.

Tilt the mold so that the caramel evenly coats the bottom and a bit up the sides. Place mold in the roasting pan and set aside.

Preheat the oven to 325 degrees. Bring a kettle of water to boil for the water bath and keep it hot.

Combine the cream, cinnamon and vanilla in a small saucepan over medium-low heat. Bring the cream to a brief simmer, stirring occasionally. Take care not to let the cream come to a full boil to prevent it from spilling over.

In a large bowl, cream together the whole eggs and yolks with the remaining 1/2 cup of sugar and salt. Whisk until the mixture is pale yellow and thick.

Temper the egg mixture by gradually whisking in the hot cream mixture (don’t add it too quickly or the eggs will cook).

Pass the mixture through a strainer into a large measuring cup to ensure that the flan will be perfectly smooth. Pour the custard into the caramel-coated mold.

To create the water bath: Pour the hot (not boiling) water into the roasting pan to come halfway up the side of the mold; be careful not to get water into the custard.

Carefully transfer to the middle oven rack, and back for 30 to 45 minutes, until the custard is barely set and just jiggles slightly.

Let the flan cool in the water bath, then refrigerate for at least 4 hours or overnight.

When you are ready to serve, run a knife around the inside of the mold to loosen the flan. Place a dessert plate on top of the flan and invert to pop it out. Done!

photo by Jenny MacBethMy finished plate.

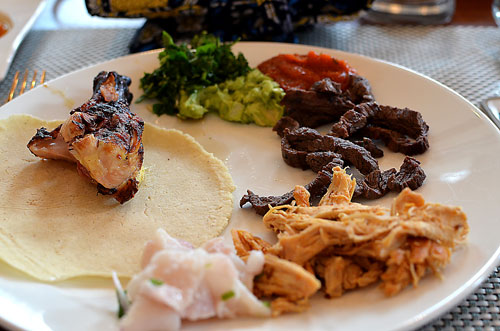
Time to eat. In the center of the dining room, they have, what they call, a “communal table.” We all took a seat and started to enjoy our meal. May I have another Margarita?

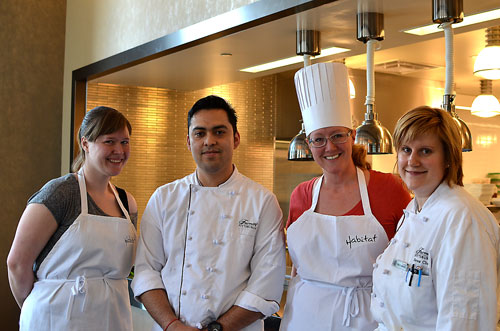
photo by Jenny MacBethIn this picture from left to right: Nicole, Chef Luis, Chef Jenny <wink>, and Chef Paula.

We had a blast. Not only did we get to enjoy a delicious dinner, we met many wonderful people from the chefs to the lovely ladies at our table. How fun!

The Habitat is the second restaurant to make my Pittsburgh Favorite list. Outstanding. “The experience is one to share.”


photo by Jenny MacBeth

Palo Santo Wood Beer Braised Baby Backs


Update

It has been a busy and stressful fall for us. So busy that I haven’t had much time to cook. Kinda bums me out. I also have several new recipes I need to get posted. It takes a lot of time to keep up on a food blog. From photography to writing witty banters. As much as I love it, it’s been a low priority for me. Sad.

For the holidays, we head to our families for Christmas eve and Christmas day. No menu planning for me, but I have to bring something. I went hunting in my freezer and caught a few racks of ribs. I was thinking, “I don’t have the time to make this recipe, but ribs sound yummy. What can I do?”

I’m actually going to make a version of this in the slow cooker for Christmas. One would think that slow cooking would take longer, but this will cut the time in half. You will not need to marinade, use as many ingredients, or have as many steps. So why not just always make ribs in the slow cooker? Well, I still prefer the recipe below because I prefer dry ribs with a dipping sauce. If I had a grill, that would be the best way.

Let’s get started

Obviously, the full rack of ribs will not fit in your slow cooker. I’m going to cut three ribs together, and toss in the following ingredients.

2 Rack of Ribs, cut

1/2 Cup of dark brown sugar

1 teaspoon of crushed red pepper

1 teaspoon of Old Bay

1 medium onion, diced

1 bottle of dark beer

1/4 cup of honey

1/3 cup of Worcestershire

1/4 cup of white wine vinegar

Cook on high for about 4-5 hours, or until the meat is nice and tender (falling off the rack). That’s it!

I hope you enjoy your holidays. Peace to you and your family.

Original Post

In the past, the only way I’ve made baby back ribs is on an open campfire with just a little season salt and ground pepper. However, for Mother’s Day, I had to add a BBQ sauce for my favorite mother-in-law. Not a fan of BBQ, I had to really put my thoughts together on this recipe. Of course I wanted her to love it because it is for her after all, but I also wanted to enjoy the ribs. I’m cooking it after all.

Hmm. Where do I begin. The rub…

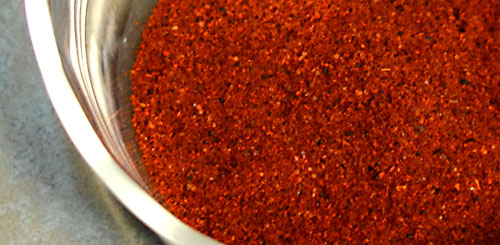
photo by Jenny MacBethA mixture of spices make the world go round. I love the unique smells and flavors of each of them.

You can do this a few hours before, or at least one hour before cooking. Better still rub down your meat the night before and let it chill out in the refrigerator.

Rub Ingredients

1/2 Cup of dark brown sugar

1 teaspoon of ground cloves (I buy whole and ground myself. Makes me feel like a chef, I guess)

1 teaspoon of paprika

1 teaspoon of crushed red pepper

1 teaspoon of green jalapeno seasoning

1 teaspoon of Old Bay

1 teaspoon of ground thyme

1 Tablespoon of chili powder

1 medium Mayan onion, grind in a blender for juices

Mix all of the above together.

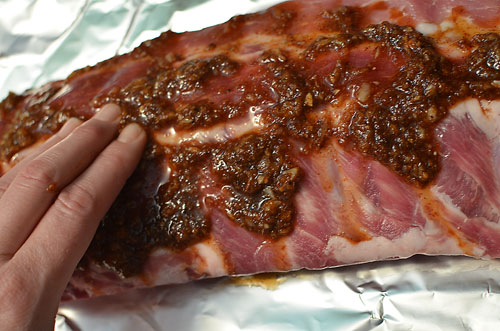
photo by Jenny MacBethPlace a rack of ribs on a long piece of aluminum foil. Rub both side of the rack, making sure to cover the meat.

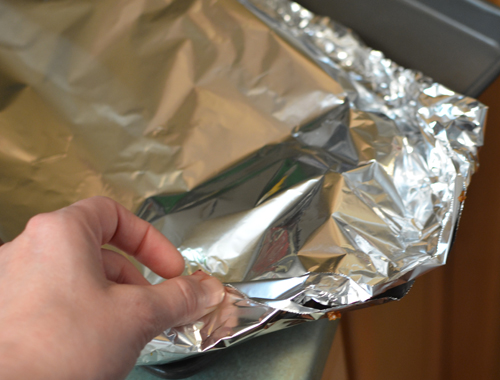
photo by Jenny MacBethTake another long piece of foil and set it on top. Pinch and fold the layers together to seal. Place in the refrigerator over night or a few hours before cooking.

Time for the saucy stuff that makes you go yum…

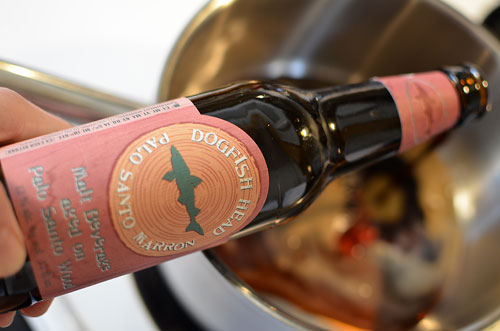
photo by Jenny MacBethGrab a beer, and make sure you get one for yourself.

Sauce Ingredients

I used Dogfish Head that is brewed in Palo Santo Wood.

Palo Santo means “holy tree,” and its wood has been used in South American wine-making communities. The caramel and vanilla complexity unique to this beer comes from the exotic Paraguayan Palo Santo wood…

via Dogfish web site

But I’m a strong believer that beer makes sauces better, so try it with another malt beverage if you choose.

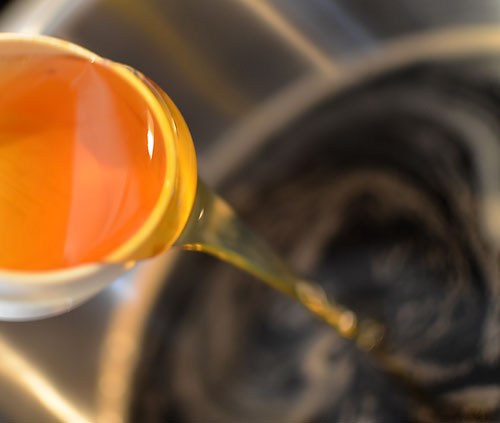
photo by Jenny MacBethAdd in…

1/4 cup of honey

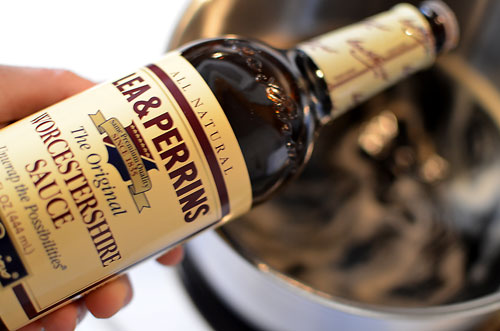
photo by Jenny MacBethAdd in…

1/3 Cup of Worcestershire. I love Lea & Perrins. L & P is like Heinz is to ketchup. – Nothing better.

1/4 Cup of white wine vinegar

photo by Jenny MacBethThe remaining ingredients…

5 garlic cloves, chopped

6 green onions, finely chopped

1/4 Cup of dark brown sugar

1 Cup of Heinz ketchup (I’ll warn you now. Do not use anything but Heinz)

1/4 Cup of olive oil

1 Tablespoon of Chinese chili garlic sauce

Bring it all to a boil. Simmer over medium heat. Let it reduce and thicken for about five minutes. Set aside and cover.

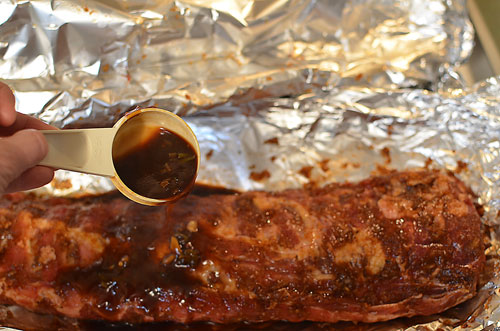
photo by Jenny MacBethPreheat your oven for 250. Take the ribs out of the refrigerator and open the foil. Pour 1/4 cup of cooked sauce over the top. Reseal and place racks in a roaster, or on a baking sheet. Cook for 1 1/2 hours. Turn heat up to 275 and cook for another 1 to 1-1/2 more hours. or until ribs are tender and done.

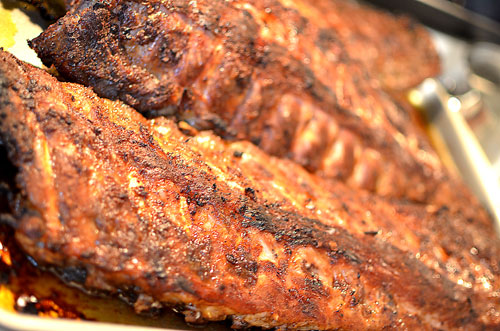
Take the ribs out of the foil and place on a baking sheet to broil until skin becomes crispy.

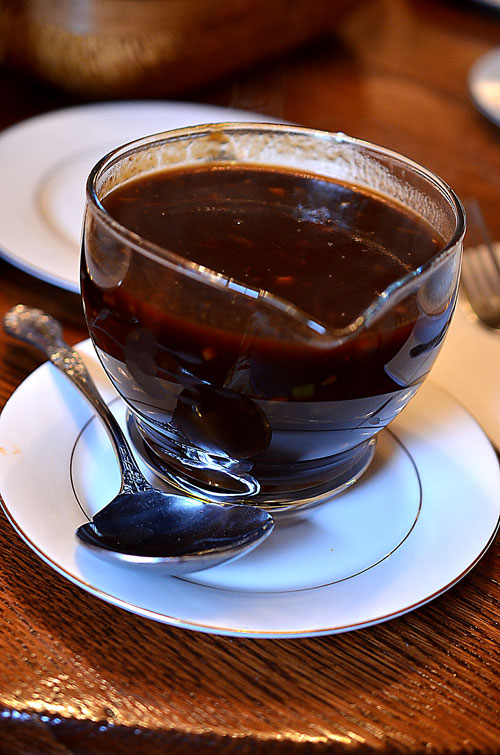
photo by Glen GreenWarm up the sauce and put into a serving dish.

photo by Jenny MacBethSlice the racks into four rib bone portions. I always allow each guest to add their own sauce. The recipe makes just enough for dipping three racks of baby backs. If you like your ribs nice and sloppy, double the recipe.

Fantastic. I love how they smelled up our house. So moan-worthy.

The reason for this recipe was inspired by mom. A conversation with my mother-in-law prior to making these delicious ribs…

Me, “If you were on death row, what would be your last meal?” Mom, “Lasagne. Well, I like everything. Hmmm. Well. I don’t know. Oooo, I really like baby back ribs. Oh! And, I like shrimp scampi.” – Stay tuned for the shrimp scampi recipe.

What’s your favorite baby back rib recipe? Because this girl likes to eat.